Clean FRCS notes with inline figures
Use of arthrogram
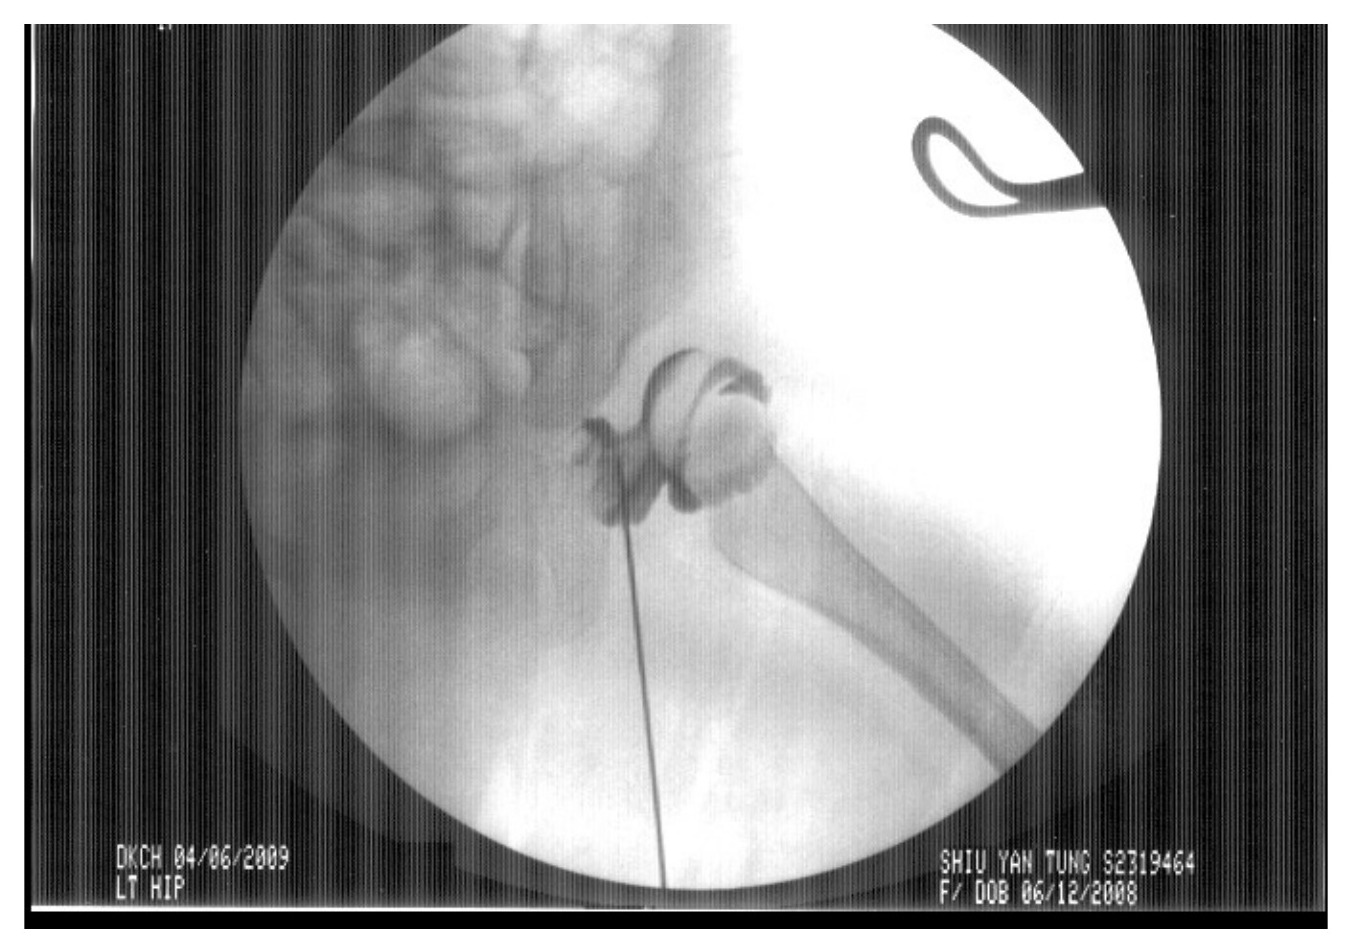
•Assess congruency of reduction
•Define obstacles to reduction
•Delineate optimal position for immobilization
How to perform?
•GA, supine
Xray control
•CR first
Medial subadductor approach, aiming for ipsilateral scapula
•22gauge needle Injection NS and look for back flow
•Inject small amount of dye to confirm position
•Image at dislocated and reduced position
•Risk: damage to cartilage, injection into growth plate. Vessel injury
•Adductor tenotomy if post reduction narrow safe zone (increase abduction safe zone)
•Psoas tendon release if the hip tend to sublux as the hip was extended below 90 degrees (increase extension safe zone)
Structure that obscure reduction
•intra-capsular 2+2+2
•Superior
•Inverted labrum
•Neolimbus
•Central
•Pulvinar
•Ligamentum teres
•Inferior
•Transverse acetabular ligament
•Constricted capsule
•Extra-capsular
•Tight Iliopsoas
•Tight Adductor
•Look for medial pooling >7mm
What is safe zone of Ramsey?
•Cone of motion that the hip spica allows the hip to move without dislocating
•Defined as the difference (in degrees) between the angle of maximal hip abduction (cause AVN) and the hip adduction at which the femoral head dislocates with the hip examined in 90 degree flexion
•Safety cone = a cone-shaped zone that is within 15-20 degree of the maximal range of motion and dislocation range (satisfactory if at least 40 degree)
•Two important factors to consider
•The average movement of the hip in the hip spica is 15deg, so it is important to keep the hip away from the line of dislocation by about 20 degree
•The risk of AVN increases with the hip put at max ROM so it is safe to be 20 degree inside the maximum ROM
•If successful reduction with <7mm medial pooling
•Check range with stable reduction
•If congruent reduction, large zone of safety (safety zone larger than 40°) → hip spica cast, take axial cut CT to r/o posterior dislocation
•Otherwise→ open reduction